CastleCMS Feature of the Week: Tiles, Design, Layouts, and Mosaic
CastleCMS is Wildcard Corp's custom content management system built off of Plone. At Wildcard we pride ourselves in CastleCMS’ strong security and its ever-growing adaptable features available to its users.
One of the most distinct elements of CastleCMS is the Mosaic Layout Editor, which is a Plone add-on that allows the user to manage layouts in CastleCMS from the Plone interface. Mosaic follows a “grid” layout style, allowing the user to add a variety of different tiles of content to their website, while keeping a unified, clean, responsive look and still offering flexibility as to where the user wants to place the items on the page. Below, I'll explain the 3 simple steps to create a page layout that best suits your website’s needs.
Step 1. Building a 'Design'
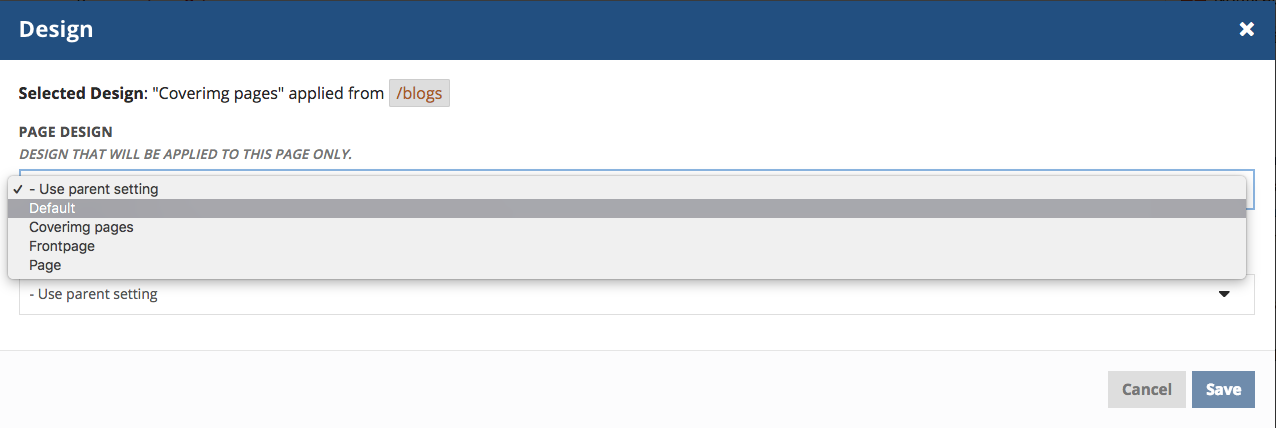
A design is a feature in CastleCMS that allows a user to have unique styles of individual pages of a website, built with HTML and CSS programming languages. When building a design, you want to consider which items of the header, footer, and slots areas are going to be different on each page of your website; think of it as defining the general style of a page without focusing on content. In other words, the user wouldn't need to worry about having any content on pages in order to create a 'design.' Let me provide you an example.. let's say there are certain pages of your website that you want to have a header image and other pages not to. Or, having different information in the footer area on some pages than others. Castle's Design feature allows you create a design for each of those instances.
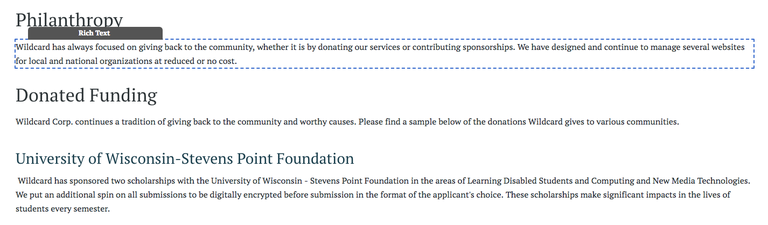
Designs allow you to create a custom style for those pages with HTML files that once completed, you can then apply to any page on your website in CastleCMS. Castle also allows the capability to apply a ‘design’ to sections of that page. For example, let’s say you have a page called blogs, and within that page are several different blog posts with content in each of those posts (like what you are reading right now!); Castle gives the capability to apply the Design you have on the blogs page that is containing all of those blogs, to the blog posts within that main page as well. That is to say, pages within that main ‘blog’ folder. After applying your unique design style to a page, you can move on to adding content to those pages using tiles.
Step 2. Adding Tiles of Content to Customize your Website
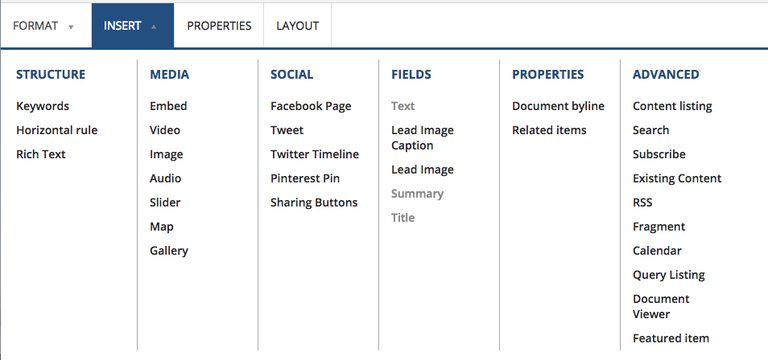
Now that we've discussed how to create a basic Design for each page, let's talk about adding content using the variety of tiles available to you in CastleCMS. Tiles are specific items you place into the mosaic grid layout, in order to add personalized content to a page. Tiles come in a array of different categories ranging from the structure of the page layout such as rich text descriptions, summaries, and header text; to media tiles such as adding images, videos, maps, and gallieres; to even advanced tiles that include content listings, query listings, document viewers, search bars, and more. These tiles I listed just scratch the surface as to what content can easily be added to a page, in order to personalize your website using CastleCMS.
Now that we've gone over what items of content are available to add to a website using Castle's tiles, how do we go about adding them to a page?
Well, Castle's Mosaic Layout Editor makes it simple! You just select Edit > Insert > and then choose your tile you'd like to place onto the page. Tiles work with mosaic layout to be placed in a grid format on a page; meaning you can add any tile you'd like, top-to-bottom or left-to-right of each other in any order & as many and few as you desire. You can switch position of tiles by dragging and dropping that tile following the dotted lines around content, into a different location or next to different content on that page.
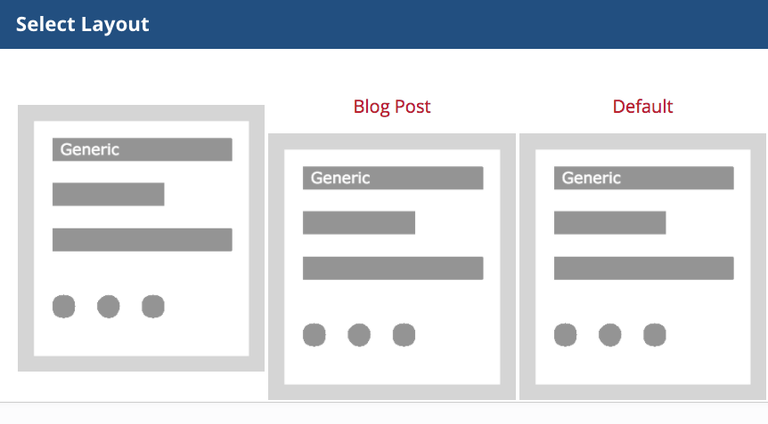
Step 3. Layouts of pages
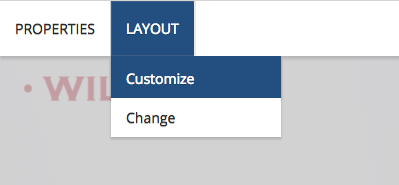
So, you’ve applied your Design style to your page for the header, footer, and slots, you’ve added your tiles of content. What next? What if you want to apply a style of content tiles to more than just one page? Well, CastleCMS has the answer for you.
CastleCMS gives you the capability to save a layout of content you’ve added to a page, so that you can apply it to several different pages. This would come in handy if you have a folder of blogs, events, or news items that you want to all look the same. Let's use the example I talked about earlier, blog posts. CastleCMS not only gives you the capability to apply a specific Design (NOT focusing on the content, but simply the header, footer, and slots) to a page, but also allows a user to apply a layout style (focusing ON the content) from one page, to several. For instance, if you want a specific layout style applied to all of your blog posts in the blogs folder that shows an image, title, summary, and main text. CastleCMS allows you to create a blog post, add the content you want using tiles placed into the mosaic layout, save that layout, and then apply it to all the blog posts in the blog folder so that each one looks the same. Cool, right?!
These three features of CastleCMS play a valuable role in building a website in a smart, easy, and user friendly way. Keeping design and content consistent is important when creating a high-end, professional website, and CastleCMS does that or you.